
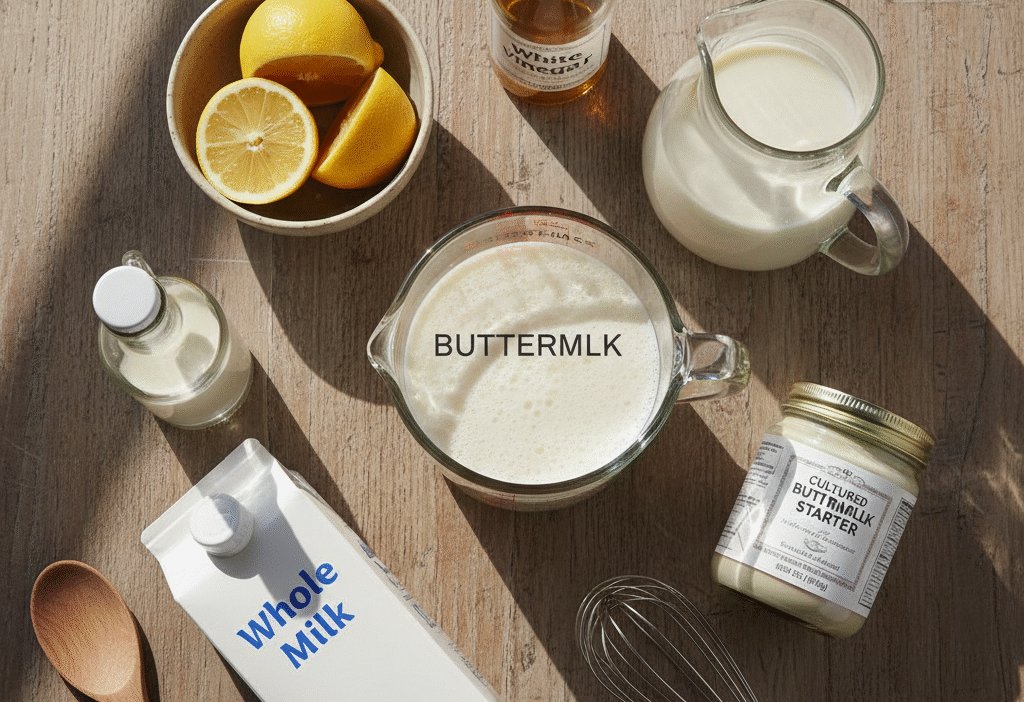
In the world of baking and culinary arts, few ingredients hold as much power as buttermilk. This tangy, creamy liquid is the secret behind the fluffiest pancakes, the most tender cakes, and the most flavorful salad dressings and marinades. Yet, how often have you been ready to bake, only to find your recipe calls for a cup of buttermilk and your fridge is bare? This moment of panic is a common rite of passage for home cooks.
As an experienced baker and culinary enthusiast who has tested countless batches of biscuits and marinades, I can assure you that the solution is simpler than you think. Knowing how to make buttermilk at home is a fundamental kitchen skill that saves time, money, and a last-minute trip to the store. This comprehensive guide will demystify buttermilk, exploring its science and providing you with several reliable, expert-approved methods to create it in your own kitchen. We’ll cover everything from the classic cultured version to the simplest buttermilk substitute for when you’re in a pinch, empowering you to bake and cook with confidence and never miss a key ingredient again.
What is Buttermilk, Really? Understanding the Science

To master how to make buttermilk, it’s helpful to know what it is. Traditionally, buttermilk was the slightly sour liquid left behind after churning butter from cultured cream. Today, the buttermilk we buy in stores is typically “cultured buttermilk,” which is made by adding specific bacterial cultures to pasteurized milk. These bacteria ferment the milk, producing lactic acid.
This lactic acid is the magic ingredient. In baking, when it reacts with baking soda (a base), it creates carbon dioxide bubbles. These bubbles are what make your baked goods rise, resulting in a light and airy texture. Beyond leavening, the acid in buttermilk also tenderizes gluten, giving cakes and muffins a softer crumb, and adds a delightful tangy flavor to dressings, dips, and fried chicken.
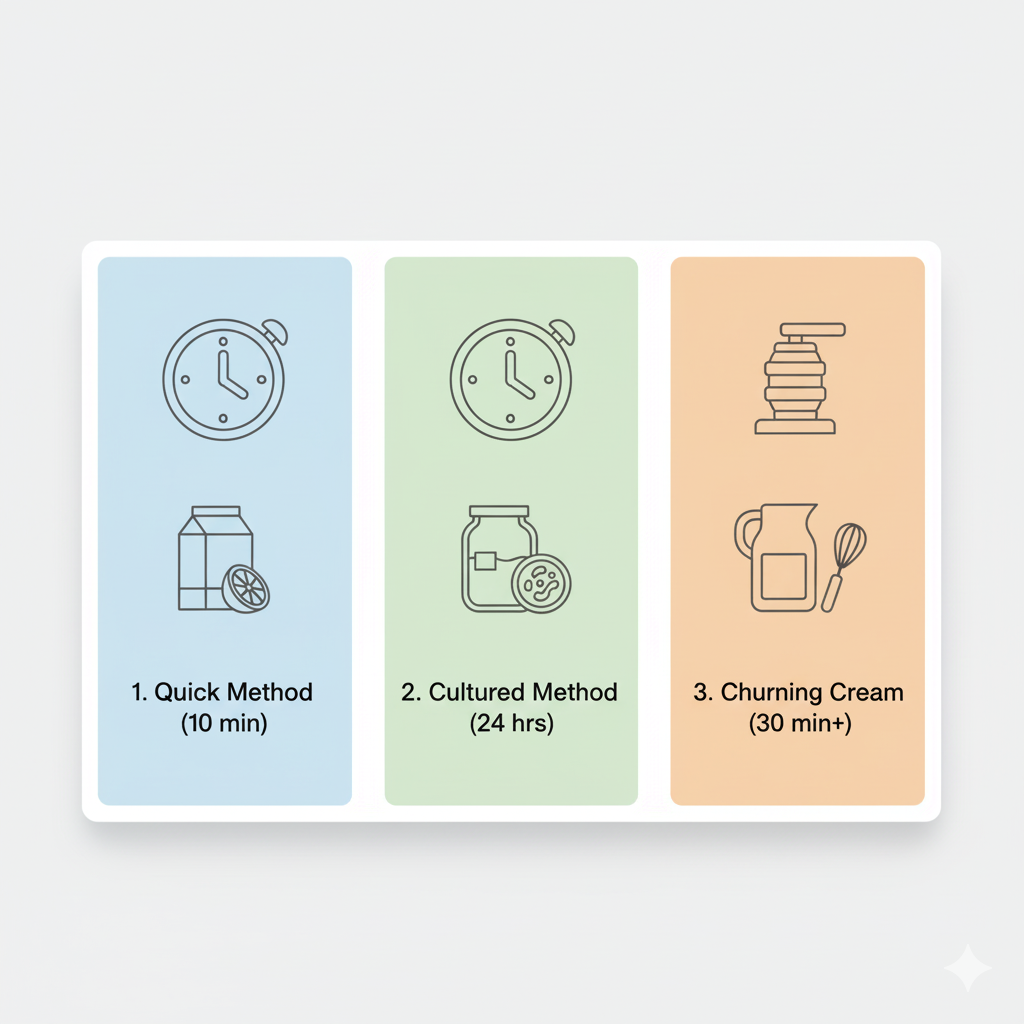
Choosing Your Method: A Quick Comparison
The best method for you depends on how much time you have and what you have on hand. Use this table to choose your preferred approach.
| Method | Time Required | Key Ingredients | Best For |
|---|---|---|---|
| Milk + Acid (Quick Fix) | 5-10 minutes | Milk, Lemon Juice or Vinegar | Emergency baking, quick recipes, immediate use. |
| Cultured Buttermilk | 12-24 hours | Milk, Store-Bought Cultured Buttermilk | Regular bakers, achieving authentic flavor & thickness. |
| Traditional (From Scratch) | 20-30 minutes + | Heavy Cream | Understanding the traditional process, a fun project. |
Your Foolproof Arsenal: 3 Expert Methods to Make Buttermilk at Home
Whether you have five minutes or five days, there is a method for you. Here are the three most reliable ways to create a buttermilk substitute.
Method 1: The Classic Milk + Acid Quick Fix (The Most Common Substitute)
This is the go-to method for most home bakers because it’s fast, easy, and uses pantry staples. The acid causes the milk to curdle and thicken slightly, mimicking the tanginess and acidity of real buttermilk.
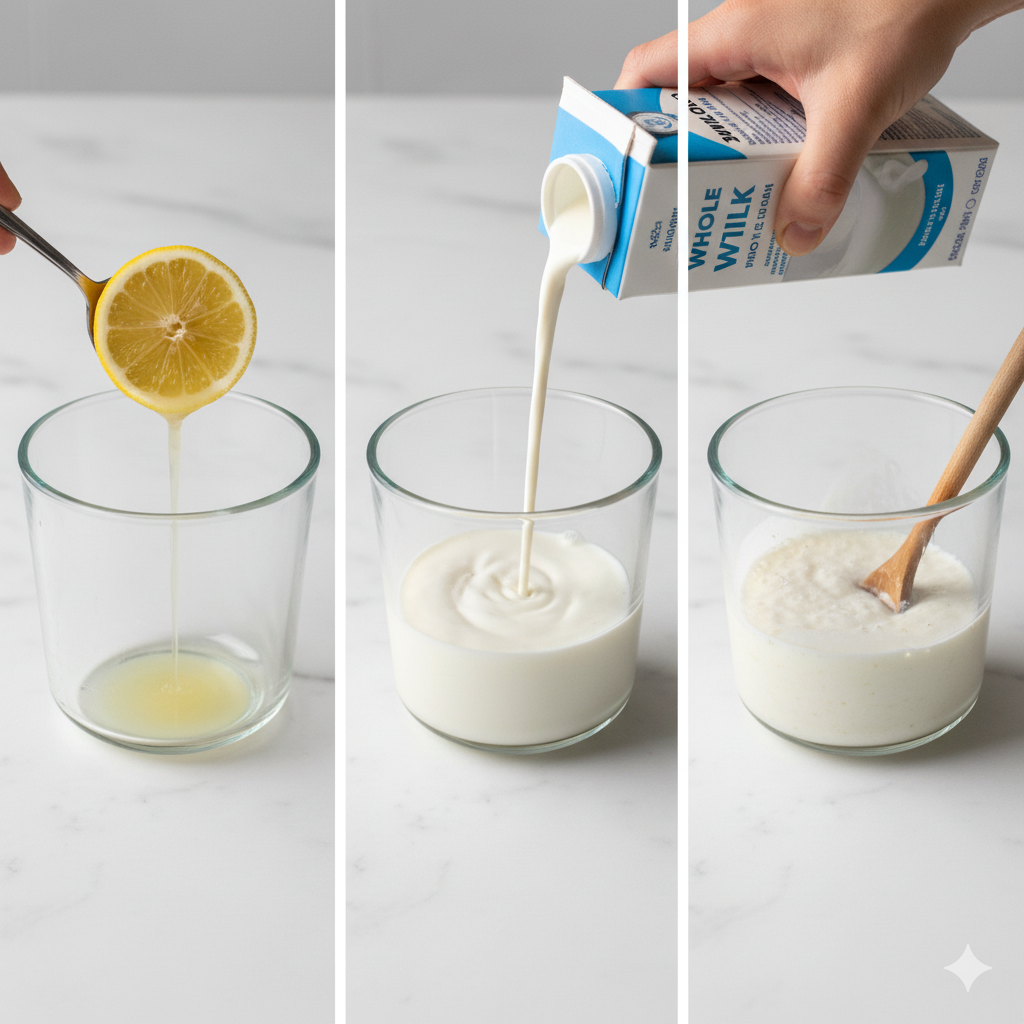
- Ratio: 1 tablespoon of acid per 1 cup of liquid.
- Step-by-Step Process:
- Choose Your Acid: The best options are either fresh lemon juice or white vinegar. Distilled white vinegar has a neutral flavor, while lemon juice can impart a very subtle citrus note, which is often undetectable in baked goods.
- Choose Your Milk: Whole milk will yield the richest and thickest result, but 2% milk, 1% milk, or even non-dairy milk like unsweetened soy or almond milk can work in a pinch.
- Combine and Wait: Place the acid in a liquid measuring cup. Add enough milk to reach the 1-cup line. Stir gently and let the mixture stand at room temperature for 5 to 10 minutes. You will see it thicken slightly and form small curds. It is now ready to use.
Method 2: The Cultured Buttermilk + Milk Method (The True Cultured Buttermilk)
This method is perfect if you bake with buttermilk regularly. It involves using a small amount of store-bought, live-cultured buttermilk as a starter to ferment fresh milk, creating a product that is chemically and biologically identical to the commercial version.
- Ratio: 1/4 cup of cultured buttermilk per 4 cups (1 quart) of milk.
- Step-by-Step Process:
- Sterilize a Jar: Clean a glass jar thoroughly with hot, soapy water.
- Combine Ingredients: Pour 4 cups of milk (whole or 2% are best) into the jar. Add the 1/4 cup of store-bought, active cultured buttermilk and stir well.
- Cover and Ferment: Loosely cover the jar (you can use the lid but don’t tighten it completely, or use a cheesecloth secured with a rubber band). Let it sit at room temperature for 12-24 hours, or until it has thickened to your liking. The time will vary based on the warmth of your kitchen.
- Store: Once thickened, seal the jar tightly and refrigerate. It will keep for up to two weeks.
Method 3: The Cream + Tartaric Acid Method (The True “Traditional” Buttermilk)
This is a less common but fascinating method that replicates the original process of buttermaking.
- Process:
- Make Butter: Vigorously shake heavy cream in a sealed jar until it separates into solid butter and liquid.
- Collect the Liquid: Strain out the solid butter. The leftover liquid is true, traditional buttermilk.
- Add Tang (Optional): This buttermilk will be thinner and less tangy than cultured buttermilk. For a closer match to the cultured version used in recipes, you can add a small pinch of tartaric acid or a squeeze of lemon juice to the liquid.
Advanced Tips and Culinary Applications
Understanding how to use your homemade buttermilk will elevate your cooking.
- For Fluffy Pancakes and Waffles: The acid in buttermilk reacts with baking soda for an incredible rise. For the best results, mix your wet and dry ingredients gently and cook immediately.
- For Tender Cakes and Muffins: Buttermilk’s acidity helps break down long strands of gluten, ensuring a soft, delicate crumb. It’s the key ingredient in classic Red Velvet cake and Devil’s Food cake.
- For the Perfect Marinade: The lactic acid in buttermilk acts as a tenderizer for meats, breaking down proteins. This is the secret to incredibly juicy and flavorful fried chicken.
- For Creamy Salad Dressings and Dips: Buttermilk provides the signature tang in ranch dressing, blue cheese dressing, and creamy vegetable dips.
Frequently Asked Questions (FAQ)
Q1: Can I make a dairy-free or vegan buttermilk?
Absolutely. The milk + acid method works perfectly with non-dairy milk. The best options are unsweetened soy milk and almond milk due to their neutral flavor and protein content. Use the same ratio: 1 tablespoon of lemon juice or vinegar per 1 cup of non-dairy milk.
Q2: What’s the difference between using vinegar and lemon juice?
Both work effectively to acidify the milk. White vinegar has a more neutral flavor, making it ideal for recipes where you don’t want any citrus note. Lemon juice can impart a very slight lemony flavor, which can be a pleasant addition to pancakes, muffins, and cakes.
Q3: My homemade buttermilk doesn’t get as thick as the store-bought kind. Is that okay?
Yes, this is completely normal, especially for the quick milk + acid method. The thickening in store-bought cultured buttermilk comes from a longer fermentation process. Your homemade version may be thinner, but it will provide the same crucial acidity for chemical leavening and flavor in your recipes.
Q4: How long does homemade buttermilk last?
The quick milk + acid substitute should be used immediately. The cultured method (using a starter) will last in the refrigerator for 1-2 weeks, similar to store-bought buttermilk.
Q5: Can I use homemade buttermilk to make a cultured buttermilk starter?
Yes, but only if you used the cultured method (Method 2). The quick milk + acid method does not contain live cultures and cannot be used to ferment a new batch.
Conclusion: Embrace the Power of Homemade Buttermilk
Mastering how to make buttermilk is a simple yet transformative skill that unlocks a new level of confidence in the kitchen. It ensures you are never held back from baking or cooking your favorite recipes. By understanding the science and keeping these easy methods in your culinary toolkit, you can effortlessly create the tangy, acidic ingredient that is essential for achieving professional-level results in your baked goods and savory dishes. So, the next time a recipe calls for buttermilk, embrace the opportunity to create it yourself and taste the difference that knowledge and a little kitchen chemistry can make.